
| 일 | 월 | 화 | 수 | 목 | 금 | 토 |
|---|---|---|---|---|---|---|
| 1 | 2 | 3 | 4 | |||
| 5 | 6 | 7 | 8 | 9 | 10 | 11 |
| 12 | 13 | 14 | 15 | 16 | 17 | 18 |
| 19 | 20 | 21 | 22 | 23 | 24 | 25 |
| 26 | 27 | 28 | 29 | 30 | 31 |
- group by
- JavaScript
- HTTP Status 404
- Bootstrap
- Oracle DB
- 이클립스
- oracle
- tomcat
- rownum
- 답변형 게시판
- 부트스트랩
- 과정평가형
- CRUD
- 성적프로그램
- sql developer
- HTTP Status 500
- 모조칼럼
- alias
- SQL
- Java
- jQuery
- 한글 인코딩
- 제약조건
- github
- Oracle SQL
- distinct
- HTML
- git
- JSP
- ||
초급의 끄적거림
[jQuery] jQuery의 정의 /선택자, css, 속성 메소드, this, index 등 연습 본문
1. jQuery
⊙ 배우기 전에 기본 지식 : HTML/CSS/JavaScript
⊙ 자바스크립트 함수들로 이루어진 라이브러리
⊙ XML문서를 쉽게 사용할 수 있는 대안
⊙ HTML 엘리먼트 선택/조작, HTML 이벤트 함수
⊙ HTML DOM traversal과 수정
⊙ 자바스크립트 효과 및 애니메이션
⊙ CSS 조작
⊙ AJAX
⊙ 자바스크립트 사용시 편리함을 위해서 사용
2. jQuery 라이브러리
⊙ 외부라이브러리 : jquery - js - moment-with-locales.jsp
⊙ D:\java0514\frontend\js\jquery-3.4.1.min.js (= basicWeb/WebContent/jquery/js/jquery.js)
3. jQuery 문법
⊙ jQuery에서는 HTML엘리먼트를 선택하고 그 엘리먼트에 '액션을 수행할 수 있다.
<형식>
$(selector).action()
- $ jQuery 라는 것을 정의
- (selector) '질의하거나 찾을' HTML엘리먼트를 의미
- jQuery action() 엘리먼트가 수행할 액션
3. 00_jquery인트로.html
- 미리 설정한 한글 인코딩으로 UTF-8로 뜨는 것을 확인 할 수 있음
<!DOCTYPE html>
<html>
<head>
<meta charset="UTF-8">
<title>00_jquery인트로.html</title>
</head>
<body>

<!-- jQuery import -->
<script src="js/jquery.js"></script>

<!-- 사용자가 작성하는 코드 -->
<script>
 //1)
 $(document).ready(function(){
 	alert("jQuery 시작");
 });

 //2)
 $(function(){
 	alert("jQuery 시작");
 });

 //3) jQuery() 축약형 $
 alert($);

</script>
</body>
</html>

4. 01_jquery시작
<jQuery의 장점>
⊙ 자바스크립트 사용시 편리함을 위해서
⊙ 요소선택이 간단하다
<!DOCTYPE html>
<html lang="ko">
<head>
<meta charset="UTF-8">
<title>01_jquery시작.html</title>
<link rel="stylesheet" href="css/reset.css" />
<link rel="stylesheet" href="http://fonts.googleapis.com/earlyaccess/notosanskr.css" />
<style>
    body {
        font-family: 'Noto Sans KR', sans-serif;
        text-align: center;
    }

    #txt {
        font-size: 50px;
        font-weight: 700;
        transition: .4s ease;
        width: 400px;
        margin: 30px auto;
        color:#424242;
        transform:scale(1) rotate(0deg);
    }

    #txt.emphasis{ /* css추가  - .emphasis 라고 . 이 찍혔기 때문에 접두어 class로 받음, # → id*/
    	color : deeppink;  /* 글자색 */
    	transform:scale(2) rotate(360deg);
    }

    #btn {
        padding: 12px 16px;
        border: none;
        cursor: pointer;
        font: 500 20px 'Noto Sans KR', sans-serif;
        background: #26C6DA;
        color: #fff;
    }

    #btn:hover {
        background: #00B8D4;
        box-shadow: 0 12px 15px 0 rgba(0, 0, 0, 0.24), 0 17px 50px 0 rgba(0, 0, 0, 0.19);
        transition: .2s ease;
    }


</style>
</head>
<body>
    <h1 id="txt">버튼을 눌러보세요.</h1>
    <!-- 내부속성이 submit -->
    <button id="btn">난 버튼</button>

    <!-- 그림 삽입할 때, 내부속성이 submit
    <input type="image" src="">
      -->

<script src="js/jquery.js"></script>
<script>
	// $("#btn").on("click", function(){});  아래 것과 동일하지만 주로 아래 것 사용
    $("#btn").click(function(){
    	//2) "안녕~" 텍스트 입력
        //$("#txt").text("안녕~")   id에 접근하는 명령어 # 이용

        //3) 강조효과
        $("#txt").text("안녕~").toggleClass("emphasis");
    });  //click end
</script>
</body>
</html>

02_jquery선택자
<jQuery에서 selector(선택자) 접근>
⊙ id=btn → $("#btn")
⊙ class=btn → $(".btn")
⊙ $("<button>") → 본문에 <button>의 요소 생성
⊙ $("button") → 본문에 <button> 요소 선택
<!DOCTYPE html>
<html lang="ko">
<head>
<meta charset="utf-8">
<title>CSS의 선택자의 활용</title>
<link rel="stylesheet" href="css/reset.css" />
<link rel="stylesheet"href="https://maxcdn.bootstrapcdn.com/font-awesome/4.6.3/css/font-awesome.min.css" integrity="sha384-T8Gy5hrqNKT+hzMclPo118YTQO6cYprQmhrYwIiQ/3axmI1hQomh7Ud2hPOy8SP1" crossorigin="anonymous">
<link rel="stylesheet" href="http://fonts.googleapis.com/earlyaccess/notosanskr.css" />
<style>

	body {
		font-family:'Noto Sans KR',sans-serif;
		margin:0;
	}

	#wrap {
		width:1000px;
		border:1px solid #333;
		margin:auto;
		box-shadow: 0 12px 15px 0 rgba(0, 0, 0, 0.24), 0 17px 50px 0 rgba(0, 0, 0, 0.19);
	}

	#header {
		width:1000px;
		height:99px;
		border-bottom:1px solid #333;
		position: relative;
		text-align: center;
		line-height:99px;
	}

	button {
		padding:12px 16px;
		border:none;
		cursor: pointer;
		font:700 20px 'Noto Sans KR',sans-serif;
		background: #26C6DA;
		color:#fff;
	}
	button:hover {
		background: #00B8D4;
		box-shadow: 0 12px 15px 0 rgba(0, 0, 0, 0.24), 0 17px 50px 0 rgba(0, 0, 0, 0.19);
		transition: .2s ease;
	}
	button:active {
		background: #00ACC1;
		transform:scale(.8);
	}

	#content ul {
		margin:20px auto;
		padding:0;
		list-style: none;
		width:960px;
	}


	#content ul:after {
		content:"";
		clear: both;
		display: block;
	}

    /* CSS 추가 */
    #content li{
    	width: 278px; height: 200px; margin: 20px; float: left; font-size: 100px; font-weight: 700
        text-align: center; line-height: 200px; border: 1px solid #333; transition: .5s ease;
    }

</style>
</head>
<body>
	<div id="wrap">
		<header id="header">
			<button><i class="fa fa-instagram"></i> 색상 변경</button>
		</header><!-- //header -->
		<div id="content">
			<ul>
				<li>1</li>
				<li>2</li>
				<li>3</li>
				<li>4</li>
				<li>5</li>
				<li>6</li>
				<li>7</li>
				<li>8</li>
				<li>9</li>
			</ul><!-- 순서가 있는 목록  -->
		</div><!-- //content -->
	</div><!-- //wrap -->
<script src="js/jquery.js"></script>

<script>
	$("#header").click(function(){
    	//자바스크립트 CSS접근 → document.getElementById("").style - jquery에서는 #
        //jQuery CSS 접근 → $("#").css()

        //2. 첫 번째 숫자색 변경
        $("li:first-childe").css("color", "#ff0000");  //꺽쇠가 없는 li태그는 본문에 있는 li 태그를 찾으라는 의미, 내부속성 접근시 사용

        //3. 숫자 3에 색 변경
        $("li:nth-child(3)").css("color", "#ff0000");
        $("li:eq(2)").css("color", "##ff0000");

        //4. 숫자7의 색 변경
        $("li:nth-child(7)").css("color", "#45bbcc");
        $("li:eq(6)").css("color", '#45bbcc");

        //5. 마지막 숫자의 배경색 변경
        $("li:last-child").css("background", "#ee55ee");
  	    });  //click end
</script>
</body>
</html>
* 03_회원가입, 05_text, 07, 08 안함, 80번대는 두 개정도 하겠지만 안하는 것도 연습해보면 유용
04_css메소드 ★중요★
<getter와 setter 함수>
- jQuery는 대부분 getter와 setter 함수 이름을 같이 사용
1) css(속성명, 속성값) : setter
2) css(속성명) : getter
3) css({속성명:속성값, 속성명:속성값, ~}) : {} 사용하여 여러 개의 속성을 한꺼번에 세팅 (JSON문법)
<!DOCTYPE html>
<html lang="ko">
<head>
<meta charset="utf-8"/>
<title>css메서드</title>
<link rel="stylesheet" href="https://maxcdn.bootstrapcdn.com/font-awesome/4.6.3/css/font-awesome.min.css" integrity="sha384-T8Gy5hrqNKT+hzMclPo118YTQO6cYprQmhrYwIiQ/3axmI1hQomh7Ud2hPOy8SP1" crossorigin="anonymous">
<link rel="stylesheet" href="http://fonts.googleapis.com/earlyaccess/notosanskr.css" />
<style type="text/css">
	body {
		font-family: 'Noto Sans KR', sans-serif;
	}
	button {
		font:16px 'Noto Sans KR', sans-serif;
		padding:8px 16px;
	}
	#box {
		width:400px;
		height:300px;
		border:1px solid #000;
	}
</style>
</head>
<body>

	<p>
		<button>색상입력</button>
		<button>높이얻기</button>
		<button>여러개의 속성을 한번에 변경</button>
	</p>
	<div id='box'></div>

<script src="js/jquery.js"></script>
<script>
   //위 button은 각자의 id가 지정되어있지 않지만 eq()를 사용하여 개별 접근이 가능함
    //1) 첫 번째 버튼 → 상자의 색 변경
    $("button:eq(0)").click(function(){
    	//setter 함수
        $("#box").css("background", "deepskyblue");
    });//click end

    //2) 두 번째 버튼 → 상자의 높이 알림
    $("button:eq(1)").click(function(){
    	//getter 함수
        var height=$("#box").css("height");
        alert(height);
    });//click end

    //3) 세 번재 버튼 → 여러 개의 속성이 한번에 변경
    $("button:eq(2)").click(function(){
    	//JSON → key(name)와 value 구성
        var width=800;
        $("#box").css({ "width":width, height:600,  //지정한 var width가 800으로 들어가고 height는 그냥 같이 넣어줌
 	      	        "background": "url(img/b_ryan.png)", "border" : "50px dotted red"})
    });//click end

</script>
</body>
</html>
05_text_html.html
!DOCTYPE html>
<html lang="ko">
<head>
<meta http-equiv="Content-Type" content="text/html; charset=utf-8"/>
<title>text_html메서드</title>
<style type="text/css">
	#text,#html {
		width:250px;
		height:100px;
		border:1px solid #333;
		margin-bottom:40px;
	}
</style>
</head>
<body>
	<p>
		<button>입력!</button>
	</p>
	<div id="text"></div>
	<div id="html"></div>
<script src="js/jquery.js"></script>
<script>
	$("button").click(function(){
     var txt="<img src='img/k7.png'>";

    //단순 문자열 출력
    $("#text").text(txt);

    //문자열이 마크업되면서 출력 (요소 생성)
    $("#html").html(txt);

    //JavaScript
    //document.getElementById("html").innerHTML=txt
    });
</script>
</body>
</html>

06_속성관련메소드
<img> 요소 element
src, alt, title 속성 property attribute
css() test() html()
prop() attr()
ajax() → 댓글 관련해서 많이 사용
- 첫 번째 버튼 'title얻기'를 누르면 title에 적혀 있던 '라이언' 이라는 내용이 발생
- 두 번째 버튼 'src변경' 을 누르면 지정되어 있던 무지 그림이 나타남
<!DOCTYPE html>
<html lang="ko">
<head>
<meta  charset="utf-8"/>
<title>속성관련메서드</title>
<link rel="stylesheet" href="https://maxcdn.bootstrapcdn.com/font-awesome/4.6.3/css/font-awesome.min.css" integrity="sha384-T8Gy5hrqNKT+hzMclPo118YTQO6cYprQmhrYwIiQ/3axmI1hQomh7Ud2hPOy8SP1" crossorigin="anonymous">
<link rel="stylesheet" href="http://fonts.googleapis.com/earlyaccess/notosanskr.css" />
<style>

	body {
		font-family: 'Noto Sans KR', sans-serif;
	}
	button {
		font:16px 'Noto Sans KR', sans-serif;
		padding:8px 16px;
	}
</style>

</head>
<body>
	<p>
		<button>title얻기</button>
		<button>src변경</button>
        <button>속성여러개 변경</button>
	</p>
	<img src="img/b_ryan.png" alt="라이언" title="라이언"/>
<script src="js/jquery.js"></script>
<script>
	$("button:eq(0)").click(function(){
    	var title=$("img").attr("title");  //getter
        alert(title);
    }); //click() end

    $("button:eq(1)").click(function(){
    	$("img").attr("src", "img/b_muzi.png");  //setter
    }); //click() end

    $("button:eq(2)").click(function(){
    	var obj={"width" : "400", "height" : 300, "src" : 'img/b_con.png', "alt" : "콘", "title" : "con"
        $("img").attr(obj);
    }); //click() end
</script>
</body>
</html>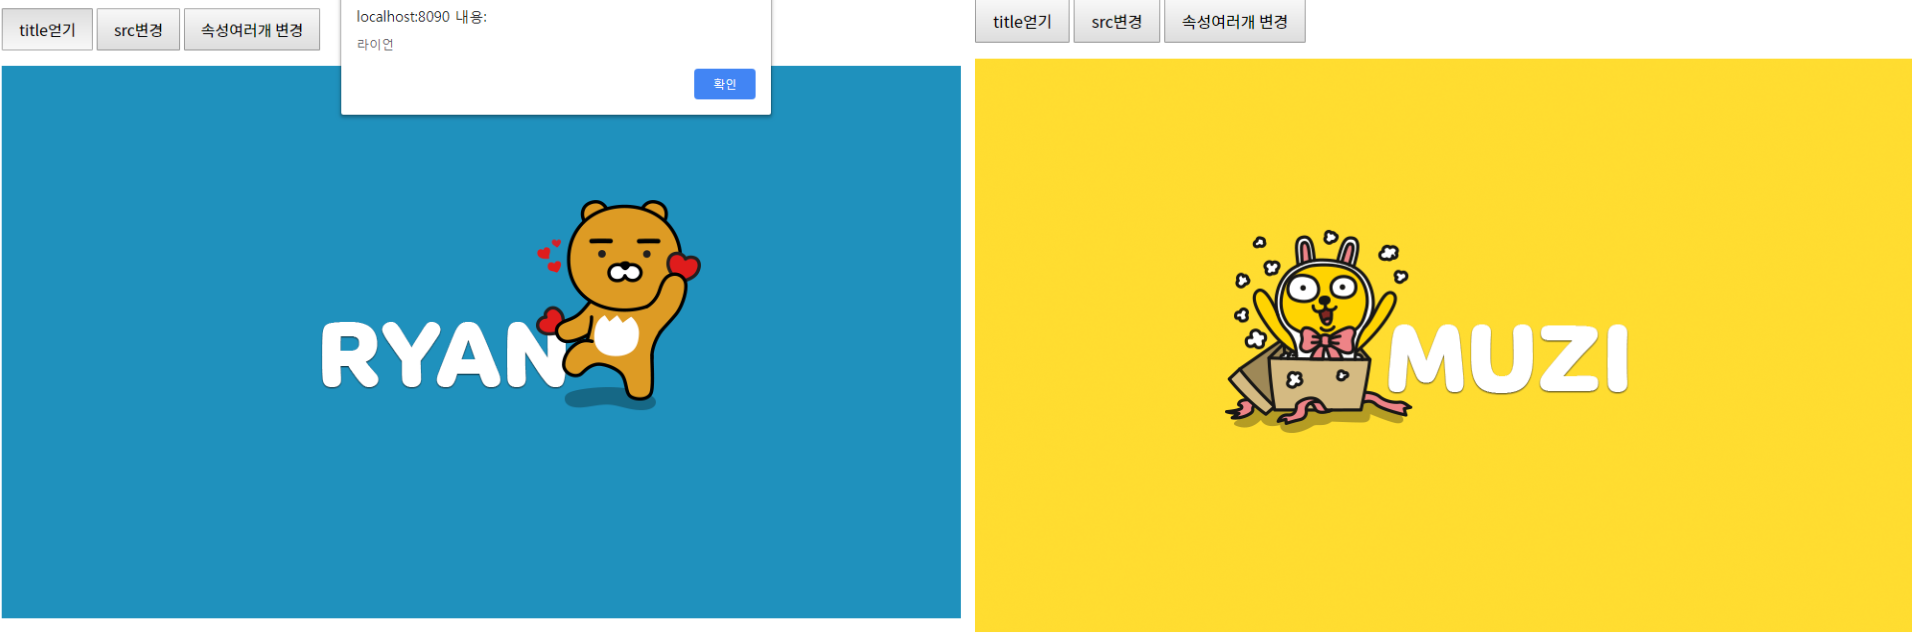
- 세번째 '속성 여러개 변경' 을 누르면 사진변경, 사진의 크기 변경, title도 con 으로 변경된 것을 확인할 수 있음

09_this와index
1. 개별접근 방식 : 1) id를 넣기 2) 0, 1, 2번째를 넣어 배열로서 접근
2. this : 사용자가 선택한 요소 자신을 가리킴
1) JavaScript
this.style.color="red"
2) jQuery
this.css("color", "red") 적용안됨
순수자바스클비트 요소 객체 this를 jQuery객체 $(this)로 변경한 후 사용한다
3. $(this) : jQuery에서 this 객체 접근
$("this") : 본문에서 <this>요소를 선택
$("<this>") : 본문에 <this> 요소 생성 (기존에 있다하더라도 만들어짐)
<!DOCTYPE html>
<html lang="ko">
<head>
    <meta charset="UTF-8">
    <title>우리가 클릭한 요소와 인덱스 얻기</title>
</head>
<body>
    <button>버튼</button>
    <button>버튼</button>
    <button>버튼</button>

<script src="js/jquery.js"></script>

<script>
  $("button").click(function(){

  	//사용자가 클릭한 버튼의 글자색 변경
    $(this).css("color", "red");

    //사용자가 선택한 요소의 인덱스 얻어오기
    var idx=$(this).index();
    alert(idX);
  });//click() end

</script>
</body>
</html>
- 사용자가 클릭한 버튼의 글자색 변경

- 사용자가 선택한 요소의 인덱스 얻어오기 (여기서는 가운데 있는 것의 인덱스를 선택함)

'jQuery' 카테고리의 다른 글
| [jQuery] table의 td / ul의 li 값 가져오기 (0) | 2021.09.06 |
|---|---|
| [jQuery] $(function(){ }); 부분이 실행 안될 때 Uncaught ReferenceError: $ is not defined (0) | 2019.10.29 |
| [jQuery] for, each, this 연습 / 요소의 탐색과 생성 / 시계만들기 / 날짜 자동생성 (0) | 2019.09.02 |
| [jQuery] jQuery 관련 이클립스 플러그인 tern 환경설정 (0) | 2019.08.30 |


